Painting Tips – Do You Paint the Walls or Trim First?
 Painting tips and tricks. Rather than just ornamentation, trims often give the room balance, character, and proportion. It also plays into your perception and makes the room appear larger.
But did you know that homeowners often overlook the trim and relegate it to an afterthought? When painted in the right shade, they can dramatically affect the room and enhance the design style.
The million-dollar question when painting a room is, between walls and trim, which one do you paint first?
This article takes you through the answer to the question along with a few painting tips and tricks, benefits, best colors, paints, the order of painting, and many more.
Which Comes First When Painting: Walls or Trim?
The walls and trim are usually two different surfaces hence have to be painted differently. But, which one do you paint first, the wall or trim? Generally, it depends on the situation at hand.
Paint the trim first when:
- You are planning on taping. Paint the trim first, and then you can tape them when painting the wall.
- You are cutting in and do not want to bother with a tape.
- The room is still under construction. You can save time by painting the trims first.
Paint the walls first when:
- You are in a hurry to paint the room.
- You aren’t sure about the wall color. Buy yourself time by painting the walls first. If you change the wall color, later on, you may have to change the trim too.
- You have help with painting. While it’s easy to paint the walls first with extra help, the trims need attention and skill.
Benefits of Painting Your Walls
Painting your home is much more than a weekend chore. The time and effort that goes into it are astronomical. However, it can have some surprising benefits:
- Paints protect your wall against moisture and wear and tear.
- A freshly painted wall is the easiest way to increase the value of the home without shelling out money on a remodel.
- A new coat of paint can give you an energy boost now that you are spending most of your time at home.
- Painted walls bring a dramatic change that can look aesthetically pleasing. They also cover the mark made by nails, dents, etc.
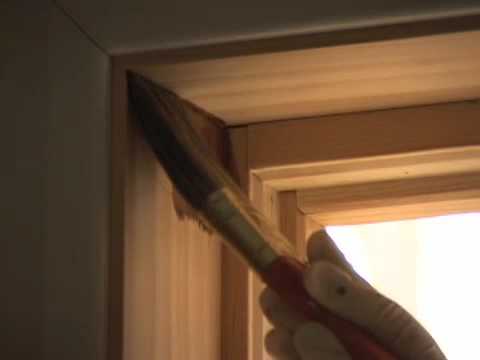
Expert Advice and Painting Tips: How to Paint Woodwork Trim
Your trim plays a significant part in the design and style of the room. With the below steps, you can paint easily for smooth results.
- For older houses, test the woodwork for the presence of lead. If the paint contains lead, you can remove them either via chemical paint strippers or encapsulation. You can also replace the existing woodwork.
- Sand the surface with 150-grit sandpaper. A palm sander helps you to sand flat surfaces and woodwork. Use flexible sanding blocks for contoured surfaces and those with a curve.
- Clean the surface with a soft, damp cloth.
- Push the nailheads below the surface and fill the nail holes with a wood filler. Do the same with dents and damaged areas.
- In the case of new trim, install them at this point.
- Place a drop cloth flush against the wall to catch the paint drips.
- Prime and paint the surface between the coats.
- After the first coat, wait the recommended time, lightly sand the surface, clean it up and then apply the second coat.
- Apply the second coat in the opposite direction to prevent lap marks.
- Make sure you paint in long strokes along the length of the trim.
Best Type of Paint for Interior Doors and Trim
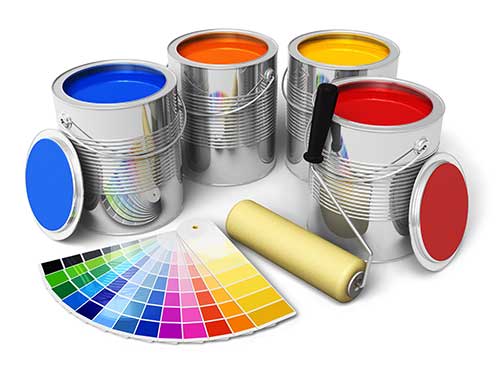 Trim paints are either oil-based or acrylic-latex.
- Oil-based paint has a superior glass-like finish with very few brush marks. The thicker consistency makes it easier to fill in the holes and dents. But, it has a slow drying time and is also challenging to clean.
- Acrylic-latex paint is not as good but still gives a good finish. The glossy look and hard rock-like texture are also missing.
Best Finish for Trim
Doors and trims benefit from a gloss or semi-gloss finish since it helps to stand out from the flatter wall surfaces.
Glossy paints have a tight molecular structure making it difficult for dirt and debris to find their way inside. And for this reason, matte or flat are strictly avoided.
Best Brush to Paint Trim
The brush you choose depends on the size of the trim and also on the type of paint. Generally, painters prefer a 2-2.5 inch angled brush for trims.
Here are the top suggestions for painting trim:
- Purdy Clearcut Glide Brush
- Wooster Silver Tip Angle Sash Brush
- Richard Elegance Trim Brush
- Jen Manufacturing Inc. Poly Foam Brush
Which Is Better for Painting Trim: Spray, Roll, or Brush?
The quality and finish you get out of painting with a spray gun are much better than any paint job. However, its limitation is the skill and the prep, which eats up into the time. You may have to mask or tape the painted walls and floor to prevent overspray. A spray gun can be ideal for painting a room where the electrical fixtures and floor are yet to be installed.
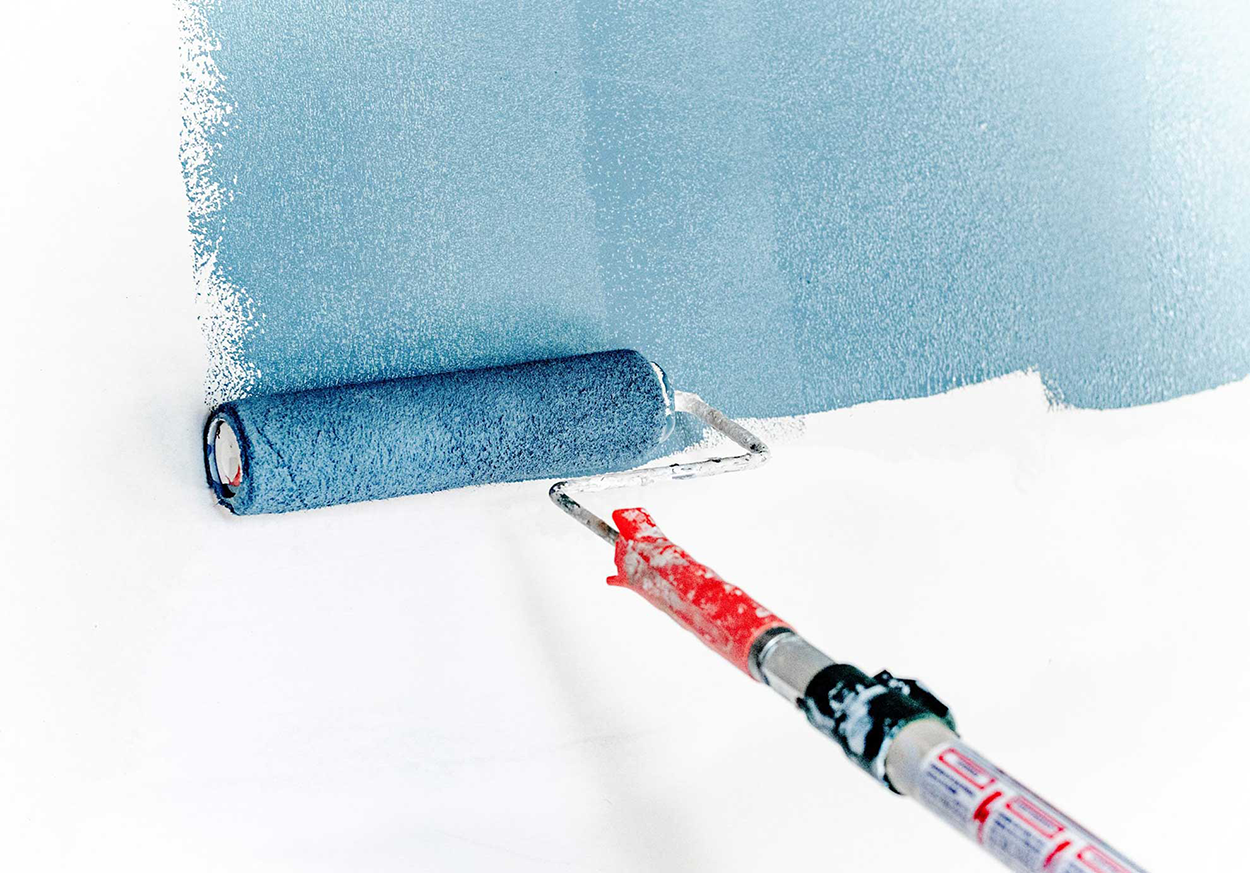
A roller can leave behind drips and swipe marks, however careful you are. Use a roller on larger surfaces like the walls.
The brush is the better and also the classic option when it comes to trims. It is easier to paint without leaving brush marks; however, brush strokes may be a sign of better workmanship, especially in higher-end designer homes.
Time Needed to Paint Trim
Painting trim can be time-consuming work, especially window and door trim. The caulking and filling can take up your time. Considering the above, baseboards are pretty much easier and faster too.
A bedroom(15×15) with the main door trim, closet door trim, skirting boards, and two window trims should take about 2 hours to prep and prime and then 2-4 hours to paint. For an amateur, you may take anywhere from 4-6 hours to paint a bedroom.
Painting your living room may not be as time-consuming. In the end, it depends on the size and condition of the trims.
Cost to Paint the Trim
Most professional painters charge you by the hour, which may be $20 to $75 per hour. As such, painting trim for a 1,500-square-foot home can cost you $500 to $1,500, excluding the porch. The porch adds $500 to $2,000 to the final amount.
Detailed work on the molding and trim can nearly double the price.
Best Color for the Trim – Painting Tips
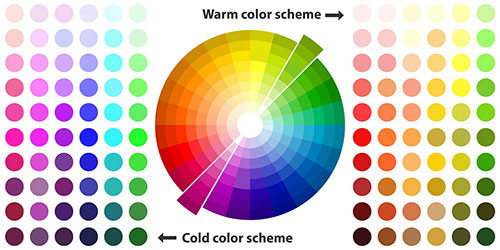 Be it the baseboards, crown molding, wainscoting, or window casing, trims bring out the best feature of your house. With trendy trim colors, you can hide flaws and refresh the look of your room.
The most popular and trendy trim colors of 2021 are:
- Black – creates an interesting contrast.
- Dark gray – with blue undertones, brings a sense of tranquility, primarily when used in the crown molding and wainscoting.
- Light taupe – adds warmth.
- Soft gray-beige – hides the dust and ideal for rooms with low traffic.
- White – intensifies the wall color.
Best White Paint for Trim – Painting Tips
Did you know that both Benjamin Moore and Sherwin Williams have more than 100 shades of white among them? While white is a classic color for trims, the right white makes all the difference between elegance and gauche.
Here is the best white paint in the market currently:
- Whitest White –
Sherwin Williams: Highly Reflective White SW (LRV 93) and Extra White SW7007
Benjamin Moore: Super White OC-152 and Decorator’s White OC-20
- Soft White –
Sherwin Williams: Alabaster SW7008, Snowbound SW7004
Benjamin Moore: White Dove OC-17, Chantilly Lace OC-65
Tips to Pick the Right Trim Paint Color
Picking out the right trim paint is mostly guesswork with multiple trips to the store. However, the painting tips from Nicole Gibbons, founder of Clare’s, simplifies the entire process making it easy to choose the paint.
- Your trim color should complement the wall paint. A warm white pairs well with other warm hues such as oranges, reds, and neutrals, while a neutral white suits blues and greens better.
- White is a classic color and pretty much never fails, but you can go for lighter walls and darker trims for a bolder look.
- A semi-gloss finish lasts long and is easy to clean. Moreover, it also reflects light in the room, making it seem bright and airy.
- While your trim color need not be the same, they need to be in the same color palette for a more cohesive look.
- Paint your trims first. Since they are more detail-oriented, you can go over and correct any imperfections.
Importance of Baseboards and Trim – Painting Tips
Though baseboards add to the aesthetic appeal of a room, it goes beyond just beauty and protects the drywall. Depending on your home, the baseboard plays an important role:
- Protects the wall against spills, structural and physical damage.
- It prevents the dust and dirt from falling inside the difficult-to-access cracks.
- Helps disguise crooked walls.
- Conceals expansion and contraction of hardwood floors.
Trim, on the other hand, adds depth and richness to any room. It is a design element that helps the design flow from one room to another, increasing its aesthetic appeal.
Painting Interior Doors, Trim and Walls the Same Color
Traditionally the trims would be of a different color, preferably white, to bring attention to the walls. However, if you are looking at a narrow or a small room, you may want to paint the ceiling, wall, and trim in the same color. Without the contrasting color to distinguish the surfaces, everything blends into one, making them disappear, and the room may appear spacious.
- If you still want a contrast, go with a slightly lighter shade or darker for the trim.
- Differentiate between the surfaces by painting the walls in a satin or eggshell finish and the trims in a semi-gloss finish.
Painting Tips to Help You Paint Trim and Walls
 While painting can look easy, the real difficulty lies in getting a smooth, brush strokes-free wall. Here are a few painting tips from professional painters to help you get the work done quickly.
- Instead of a paint chip the size of a thumbnail, get a wall paint sample. Check the color at various times of the day before finalizing.
- Measure the walls and the ceiling to calculate the surface area to paint. A gallon of paint can cover 400 sq ft. With the above detail, a paint calculator should help you decide the paint cans needed to paint walls.
- Invest in good paint packed with pigments and enough resin to hold them together.
- Thoroughly clean the walls before painting.
- Use a carpet shield to protect the carpet and floor before painting.
- Your paint job is only as good as your brush. So, go for premium brands such as Wooster or Purdy.
- Choose your roller depending on the surface you are painting. A larger roller works the best for walls and helps to cover a lot of areas faster.
- Use a painter’s tape to shield and also for cutting in wall and ceiling.
- Either paint the trim or walls first. Never toggle back and forth.
How to Paint Baseboards for a Sharp Cut Line – Painting Tips
The tricky thing when painting baseboards is to get clean and sharp lines. While a painter may find it easier to cut with a brush, it may not be so for amateurs and DIYers. Here are some more painting tips and tricks to get your baseboards looking sharp, especially when painting the trim first:
- Prep the baseboard; Clean and dust it down with a sponge.
- If there’s space underneath the base, use caulk to seal it.
- Paint the baseboard and go over the caulk and the tape.
- After drying, use a knife to score the seam right where the base meets the floor and pull the tape.
- Tape the top of the baseboard; Use the baseboard paint over the junction.
- Again use the wall color on the walls and over the junction.
- Pull the tape when dry for a clean line.
Which Is Better: Masking Tape or Painter’s Tape?
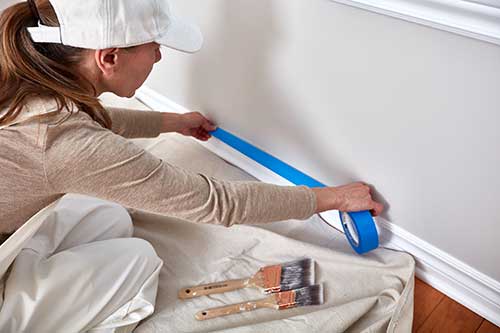 Masking tape and painter’s tape both serve the same purpose. They prevent the paint from bleeding onto unwanted areas, such as carpeting and trim, and help you get a clean, straight-edge line. But the masking tape leaves residue when pulled after a certain amount of time, but the painter’s tape is designed to come off cleanly.
Unless you want to spend hours removing sticky residue, painter’s tape is the better option.
Efficient Way to Paint a Room – Painting Tips
While there are many ways to paint a room, the secret lies in the little details. Here are a few trade secrets and painting tips shared by professional painters:
- Start by sanding; it removes the rough areas and helps the paint adhere.
- Use a degreaser to clean dirty walls.
- Your painting looks only as good as the products. Don’t skimp out on the paint and brush.
- Cover the furniture with a plastic sheet and tape it down.
- Use a tinted primer for a more vibrant finish and to prevent flashing.
- Tape off the woodwork and press it down with a putty knife to prevent bleeding.
- Run a screwdriver along the seams of the walls and the ceiling to scrape away the extra paint on the textures.
- Use canvas drop cloths instead of rags.
- Paint one wall first before moving to the next.
- Always have an extra bucket of paint or two.
- Take off the electrical outlet plates before painting.
Best Order to Paint a Room
For a quick and efficient session, you need to follow the order of painting for the best results. Here are some more painting tips to follow:
- Ceiling – By painting the ceilings first, you do not have to worry about overspray. Make sure you have a roller frame to avoid arm fatigue.
- Walls – Once the ceiling is dry, continue to the walls with at least two coats. Do not forget to prime the problem areas.
- Baseboards – Use a painter’s tape over the painted areas and then do the trim.
- Window and door frames – They are part of the trim and should be done next. Make sure to caulk and fill the dents and holes before painting.
- Door – Tackle the doors at last. With panel doors, use a sash and a roller for a flat door.
Things You Should Consider Before Painting a Room – Painting Tips
A new coat of paint can dramatically change the way a room looks and feels. It is indeed an inexpensive way of increasing the appeal without having to spend much.
Here are a few painting tips to consider before painting a room:
- Prep the room by wiping the walls, fill in the holes, tape over unnecessary portions and finally cover the floor with newspaper or drop cloth.
- Test the color of the paint both day and night before painting.
- Get bold; Do not stick with white and neutrals. Bolder colors can be refreshing.
- The finish makes or breaks the look; High gloss and semi-gloss paints look bright and are easier to clean and highlight the flaws in the wall or trim. On the other hand, a flat or matte finish can hide imperfections but gets damaged easily.
- Use a paint calculator to determine the number of paint cans you may need. There is nothing more frustrating than running for a new can in the midst of a paint job.
- Do not forget to prime. Priming helps the paint to adhere to the walls and especially when it comes to wall texture.
- To match textures, choose a nap thickness that matches the wall texture. For smooth walls, choose a nap thickness of 3/8″ and textured walls 1/2″ nap roller.
- Firstly, use a brush to lay the paint on and then use a roller to flatten the brush marks.
- Do not skimp on proper supplies.
Conclusion
 In this article, you’ve learned a lot of helpful painting tips and tricks of the trade. Do you paint the trim or walls first? Always paint walls first. This way, you can tape the walls and paint the trims. If you are painting walls after trims, the latter can catch the drops from the walls and need touch-ups.
In case you are painting the room, follow the order of painting for a smooth transition and efficient work.
Moreover, do not forget to prep and prime the area you are painting. It helps the paint to go on smoothly. Two coats should do unless you have problem areas for which you may have to do touch-ups.
Don’t want to do it yourself? Get a professional to do it for you – contact Nelson Greer Painting Contractors for your FREE quote today. With over 220 years of experience in our company’s history, you’ll love what we can do with our professional painting contractors.
Other timely articles you may find helpful: