Paint Prep Work
Are you tired of the drab and peeling paint? According to the Remodeling Impact Survey by NAR, a paint job has a joy score of 9.8. Not only that, but interior painting also has an ROI of 107%, as per a 2012 survey by HomeGain.
Painting can bring about warmth and brighten a room, however small or big. But did you know that 90% of the job is paint prep, and only 10% is the actual paint job? The prep work includes one or more of the following actions:
- Cleaning
- Sanding
- Repairing
- Priming
Only after you prepare and prime the surface can you start painting. If not, you’ll be plagued with drips, uneven lines, faded spots, and whatnot. However, with meticulous preparation spanning a few hours, you can avoid all these problems. This article will walk you through everything you need to know about interior and exterior paint prep.
Why Paint Prep the Walls?
For the most part, a clean and prepped wall gives a flawless look. Any dents, scuff marks, and blemishes, if not repaired, will be pretty evident on fresh walls. For example, your wall may have chipped paint and nail holes. Unless you fill the holes and remove the flakes, the imperfections will show through the new paint.
Moreover, paint doesn’t adhere well to dirty walls. As a result, it will look rough, botched, and faded in places. However, if you do the appropriate prep before painting, you can avoid these unfortunate incidents.
How Do I Prep for Interior Painting?
Prep can be tedious and not as attractive as painting. But rest assured, it is the most significant part if you’d like your paint job to last a few years in the least. However, not all surfaces require preparation. Moreover, the paint prep varies depending on the surface being painted. Hence, you may want to inspect and take action as the situation demands.
Here’s how you prepare the walls before an interior painting.
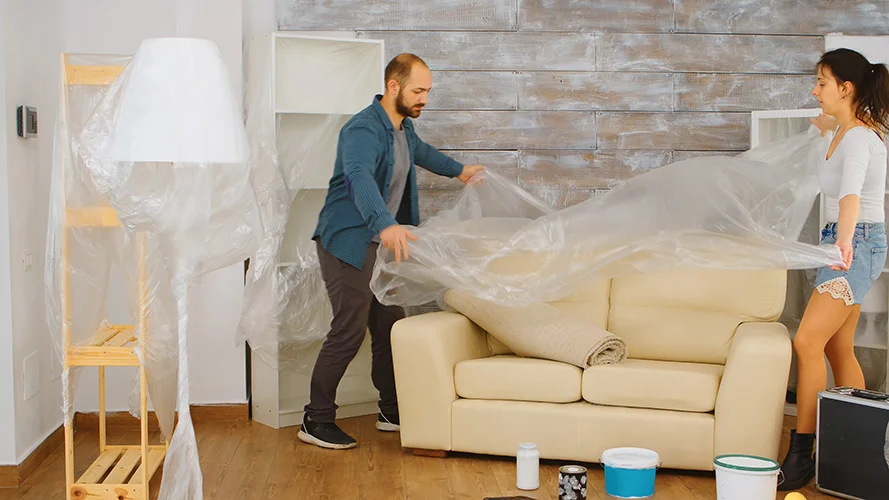
Protect Your Furniture
The first step is to protect the furniture and other fixtures from paint splatters. Skipping this step may cause unrepairable harm to the furniture. Moreover, not moving them can make certain areas of the walls inaccessible. Instead, move the furniture to the center of the room and cover them with the painter’s plastic drop cloths.
Remove Wall Plate
First, it is not mandatory to remove the outlet cover and wall plate since you can always paint over them. However, it doesn’t give a neat look since there is no visual distinction between the two. Furthermore, if you do not remove the outlet covers, the paint close-by tears and peels later on.
Lay Out Drop Cloths
Paint drips and spills are unavoidable when painting. For this reason, professionals advise you to cover the floors. If you are working on walls, cover at least 3 ft with drop cloths. And the entire floor when working on ceilings. Canvas drop cloths are much preferred among painters since they do not require tape to stay in place. However, on the downside, heavy spills will soak through.
Remove Wallpaper
If you have wallpapers, you may want to remove the wallpapers at this point. First, score the wallpaper with a scoring tool. Next, spray a wallpaper removing spray and let it remain for the recommended time per the manufacturer’s instructions. Next, use a putty knife to scrape off the paper once they are ready. Finally, wash the residue with warm water.
Alternatively, you can also use a wallpaper steamer to wet and soften the wallpaper paste.
Patch Work
Scrape off any peeling and flaking paint with a putty knife. You need not remove all the paint, only the loose ones.
Next, fill in the holes with a drywall patching compound. Apply the compound with a putty knife and flatten it for a clean look. Let it dry before you proceed to the next step.
Clean the Surface
The first thing to remember is that paint doesn’t adhere to dirty walls and peel off. Use a damp rag to clean the pet dander, dust, and other dirt from the wall. Grease, on the other hand, requires a solution of dish soap and water. Do not forget to clean every surface painted on, including walls, trim, and ceiling.
Alternatively, you can also use a surface cleaner and paint prep solution. It cleans hard surfaces prior to painting, be it wood, metal, vinyl, or surfaces with latex, oil, or acrylic paints. Moreover, it also enhances paint adhesion.
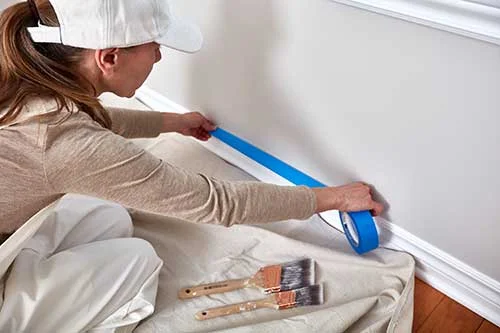
Apply Painter’s Tape
Using a painter’s tape protects the trim from drips and helps maintain a neat line.
Take care to lay down the tape and press it down flat to avoid the paint bleeding through. Also, ensure that you remove it before the paint dries completely else you risk it peeling off.
Apply the Primer
A primer hides the imperfections and gives a smooth surface for the paint. However, not all surfaces or circumstances warrant a primer. Primer is required for:
- Repaired areas
- Bare wall or wood
- Color change from dark to light
- High-gloss finish
You can also buy a tinted primer that matches the color of your paint. That way, you can save up on costs. Alternatively, you can also buy a paint-and-primer-in-one product.
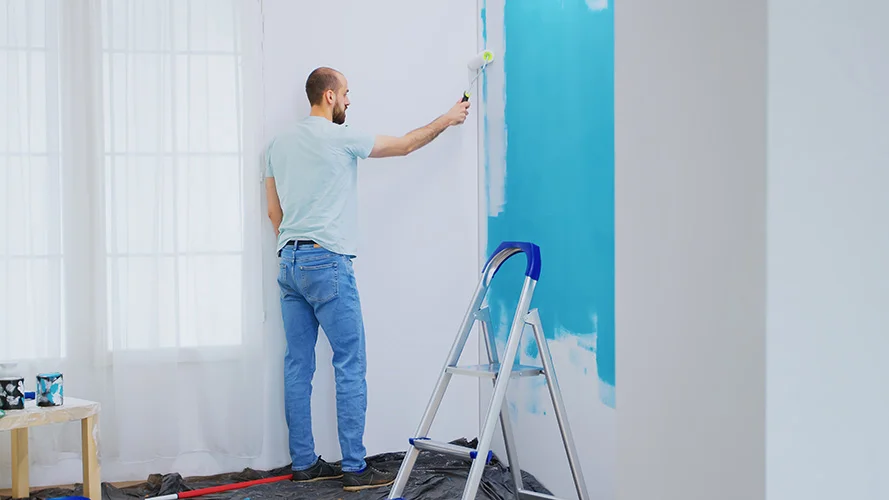
Sand the Surface
Once the primer dries, lightly sand the area with fine-grit sandpaper. Then wipe the area with a damp rag and let it dry. Your wall is now ready for painting.
How Do I Prep for Exterior Painting?
Paint prep for exterior surfaces is similar to that of interior painting. However, compared to the interior, it can be quite a demanding job, even for professionals. Here’s how you get your home ready for exterior painting.
Clean the Walls
A clean surface enhances paint adhesion and is essential for a good paint job. A quick wipe with a damp cloth should take care of the stains. However, for especially dirty areas, you need a pressure/power washer.
Choose the nozzle depending on the surface. A wooden surface cannot handle a concentrated stream of water. The water can seep in through the wood and damage from within.
Remove Mildew Stains
Ensure that you remove the mildew stains firsthand. If it is not addressed, the mildew continues to grow over the new coat. Prepare a solution of 3-4 parts of water to one part of bleach. Use a sponge to apply the solution and let it sit for a few minutes. Then, clean the area with a soft brush and rinse it off.
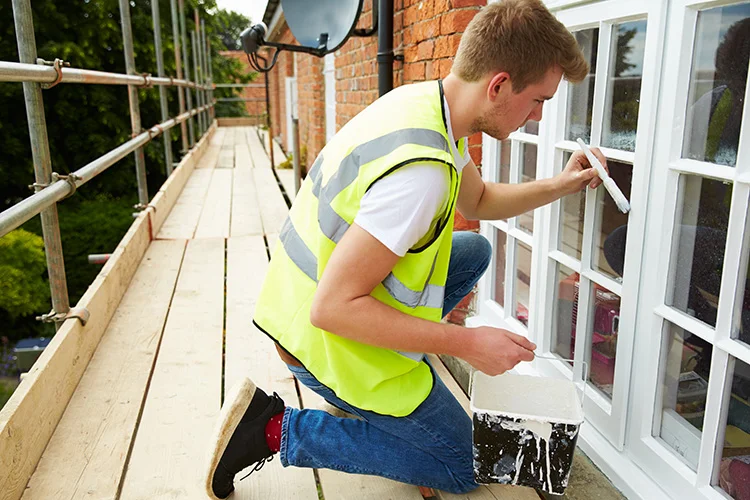
Ladder and Scaffolding
Exterior paint jobs often require a ladder and scaffolding to reach the heights in multistorey buildings. However, using them in an exterior situation is tricky since the ground can be concrete or soft dirt. For example, while ladders might work on a concrete driveway, they may not do in soft ground and sink right in. In that case, you may have to construct a scaffolding.
Ground Cover
Use drop cloths to cover the plants and shrubbery to protect them from drips and oversprays. Use a lightweight cloth, and do not forget to remove them at the end of the day to avoid killing the plants. Even better, if possible, move the plants to a temporary location. And also, be mindful of the ponds and other water features in the yard.
Use Painter’s Tape Around Obstacles
You’d have a lot more obstacles in the exterior of your house than the interior. It includes utility heads, outlet boxes, racks, and hose bibs. If possible, remove them for the duration of the project. If not, cover them with tape firsthand.
Sanding and Scraping
Use a scraping tool or wire brush to remove the loose and flaking paint. In case you used a washer for cleaning, it would have taken care of the loose flakes. Then, sand the hard surfaces with an electric sander if you know how to handle one. If not, the good old sandpaper should do the job. If your house was built before 1978, it might have lead paint underneath. In that case, you’ll have to contact a certified lead abatement contractor to check for the presence of lead.
Surface Repairs
With the flaking paint off, the repairs should be visible. Inclement climate conditions, wear and tear, or even critters can harm the exterior.
In this case, first assess the damage and make repairs. Or replace them if needed.
Next, scrape away the dried caulk and apply a new bead around the doors, windows, and trim.
Keep an Eye on the Weather
The temperature and climatic conditions play a significant part in the success of a paint job. According to the experts at BenjaminMoore, the ideal temperature for exterior painting is 35º F to 100º F. The humidity should be low at 40% to 70%. However, they may vary depending on the finish.
- Oil-based Paint: 40° – 90° F
- Latex Paint: 50° – 85° F
Furthermore, it is also advisable to avoid painting under direct sunlight.
Prime the Surface
Primer creates an even and solid base for the paint to sit on. However, not all surfaces require a primer. For example, use a primer over repaired areas to fill in the pores. Additionally, you’ll also require one if you are planning on changing wall colors. Finally, sand the primer with a light hand before painting.
Conclusion

Without proper paint prep, you are setting up for failure even before the painting has started. Although the prep takes more time than the actual job, the end result is worth the hard work.
As a final step, verify the color by painting an inconspicuous area or somewhere behind furniture. Once you are sure about the color and tint, you can go ahead and begin painting.
However, considering the complexity of the job, it’s better you hire a professional. They can ensure that the finished project is so much better and clean.
If you are looking for a stress-free painting experience, you need to choose the right contractors – contact Nelson Greer Painting Contractors for your FREE quote today. We will make sure that your home is properly painted inside and out to last you for years to come. With over 220 years of experience in our company’s history, you’ll love what we can do with our professional painting contractors.